OpenMediaVault (OMV) is a powerful, open-source NAS (Network Attached Storage) solution perfect for turning your Raspberry Pi 5 into a reliable file server. This guide will walk you through the installation process step-by-step, ensuring a smooth setup.

Why Choose OpenMediaVault?
OpenMediaVault offers numerous benefits, including:
- User-friendly interface: Easily manage your storage through a web interface.
- Support for various file systems: Use ext4, XFS, Btrfs, and more.
- Extensibility: Enhance functionality with plugins, including Docker support.
- Secure access: Set user permissions and access controls for added security.
Before starting, make sure you have the following:
- A Raspberry Pi 5 with a power supply.
- A micro SD card (at least 16GB).
- A computer for downloading and flashing the OS image.
- An active internet connection.
- An SSH client (like PuTTY for Windows or Terminal for macOS).
Install OpenMediaVault on Raspberry Pi 5
Step 1: Download and Flash Raspberry Pi OS
- Download Raspberry Pi OS: Go to the official Raspberry Pi website and download the latest Raspberry Pi OS (64-bit recommended).
- Download the Imager: Use the Raspberry Pi Imager tool to write the OS image to your micro SD card.
- Flash the Image:
- Insert your micro SD card into your computer.
- Open the Raspberry Pi Imager, select the downloaded OS image, and choose your micro SD card as the target.
- Click “Write” to begin flashing the OS onto the micro SD card.
Step 2: Enable SSH Access
- Enable SSH: In the Raspberry Pi Imager settings, you can enable SSH by clicking on the gear icon and selecting the option to enable it. Set your desired username and password here.
- Complete the flashing process and safely eject the micro SD card from your computer.
Step 3: Boot the Raspberry Pi
- Insert the flashed micro SD card into your Raspberry Pi 5 and power it on.
- Wait for the Raspberry Pi to boot up, which may take a couple of minutes.
Step 4: Connect to Raspberry Pi via SSH
- Find the IP Address: Check your router’s device list to find the IP address of your Raspberry Pi.
- Open Your SSH Client: Launch your SSH client (Terminal on macOS or PuTTY on Windows).
- Connect Using SSH:
- In the SSH client, enter your username and the IP address of your Raspberry Pi. For example, if your username is “pi” and your IP address is “192.168.1.10”, you would connect using those details.
- Accept the SSH Key: The first time you connect, you will be prompted to accept the SSH key.
Step 5: Update Your System
- Once you are logged in, update the package list to ensure you have the latest software.
- Next, upgrade the installed packages to their latest versions.
Step 6: Install OpenMediaVault
- To install OpenMediaVault, download the installation script from GitHub and execute it. This will install OMV on your Raspberry Pi.
- Wait for the installation to complete, which may take up to 30 minutes. During this time, your SSH session may temporarily disconnect.
Step 7: Access OpenMediaVault Web Interface
- Open a web browser and navigate to your Raspberry Pi’s IP address or hostname (for example, http://pi5.local).
- Log in to OpenMediaVault with the default credentials:
- Username: admin
- Password: openmediavault
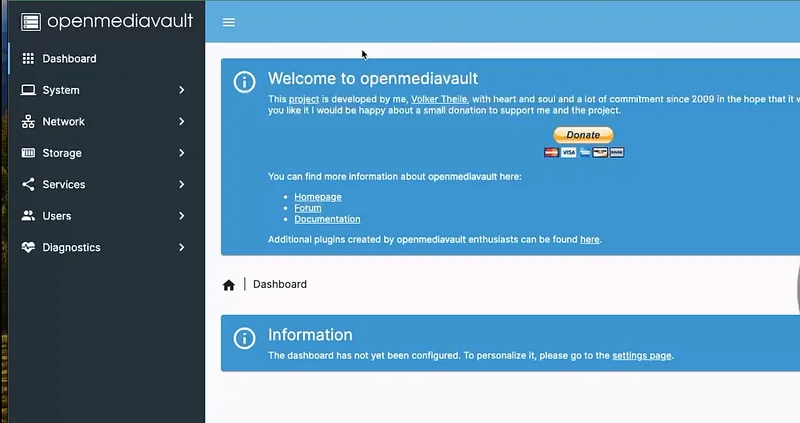
- After logging in, you will see the OpenMediaVault dashboard.
Step 8: Change Default Password
- Click on the profile icon in the upper right corner of the dashboard.
- Select “Change Password” and set a new, secure password to enhance security.

Step 9: Configure Storage
- Navigate to the Storage tab within the OpenMediaVault interface.
- If you have external drives connected, you may need to format them for use with OpenMediaVault.
Step 10: Set Up Shared Folders
- Go to the Shared Folders section under the Storage menu.
- Click on “Add” to create a new shared folder and choose the file system you prefer (such as ext4).
Step 11: Enable SMB/CIFS Service
- Go to the Services section and select SMB/CIFS.
- Activate the SMB/CIFS service and add your shared folders to make them accessible over the network.
Step 12: Create Users and Set Permissions
- Access the Access Rights Management section to add users.
- Assign permissions for accessing shared folders as needed.
Step 13: Test Access and Performance
- On another computer, open your file explorer and navigate to the network share you set up.
- Copy a file to test the upload speeds and performance of your NAS.
Troubleshooting Common Issues
Installation Warnings
During the installation, you may see messages such as:
failed to stop ntp.service: unit ntp.service not loadedfailed to stop systemd-timesyncd.service: Unit systemd-timesyncd.service not loaded.
These messages indicate that certain services are not available, which is normal since OpenMediaVault uses chrony for time synchronization. You can safely ignore these warnings.
Verify SSH Installation
To check if SSH is installed and running, you can use the package manager to look for SSH-related packages.


