Apple Maps continues to evolve, enhancing the hiking experience for outdoor enthusiasts worldwide. With the latest iOS 18 update, users now have access to thousands of detailed trail maps within U.S. national parks and topographic views, along with the ability to create personalized walking and hiking routes. This powerful feature allows you to tailor your adventures, whether you’re exploring local parks, urban landscapes, or off-the-beaten-path trails.
Why Use Custom Routes in Apple Maps?
Creating custom routes in Apple Maps has several advantages:
- Personalization: Tailor routes according to your interests, fitness level, and desired scenery. This feature is perfect for anyone looking to venture into new territories or revisit favorite paths.
- Detailed Information: The app provides critical insights such as distance, elevation changes, and route types (one-way, out-and-back, or closed-loop).
- Offline Access: Download routes for offline use, ensuring you can navigate even in remote areas without cellular or Wi-Fi connections.
- Convenient Features: Label routes with custom names, add notes, and easily manage your saved paths from your device.
Whether you’re a seasoned hiker or just enjoy leisurely walks, creating custom routes in Apple Maps can significantly enhance your experience. Let’s explore how to set up your custom routes using iOS 18 on your iPhone, iPad, or Mac.
How to Create Custom Routes in iOS 18 Apple Maps
Step 1: Start a Custom Route

You can initiate a custom route in several ways:
- From a Marked Location: If you have a specific starting point in mind, drop a pin on the map, tap the “More” button on the place card, and select “Create a Custom Route.” Note that this method is unavailable on macOS.
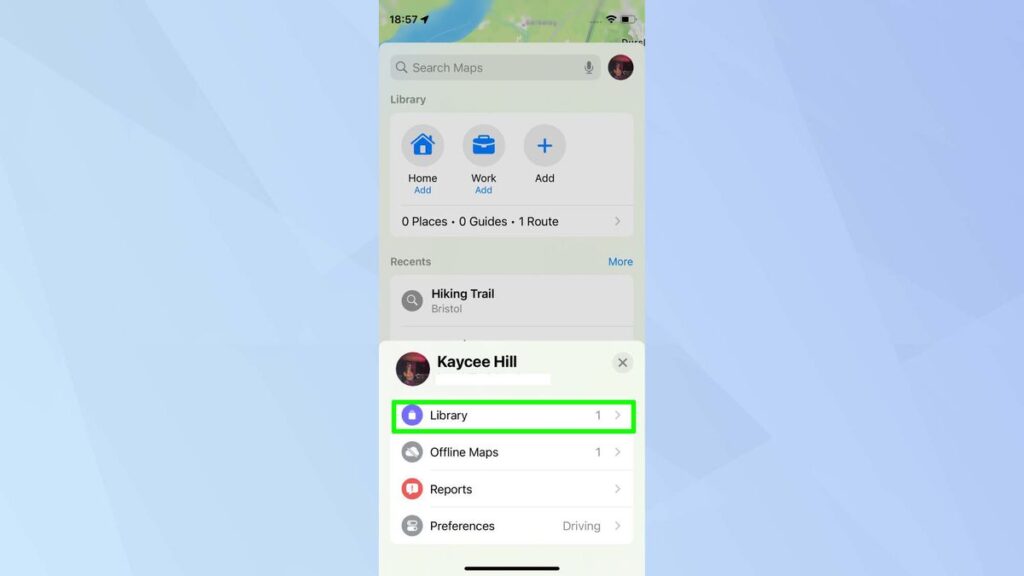
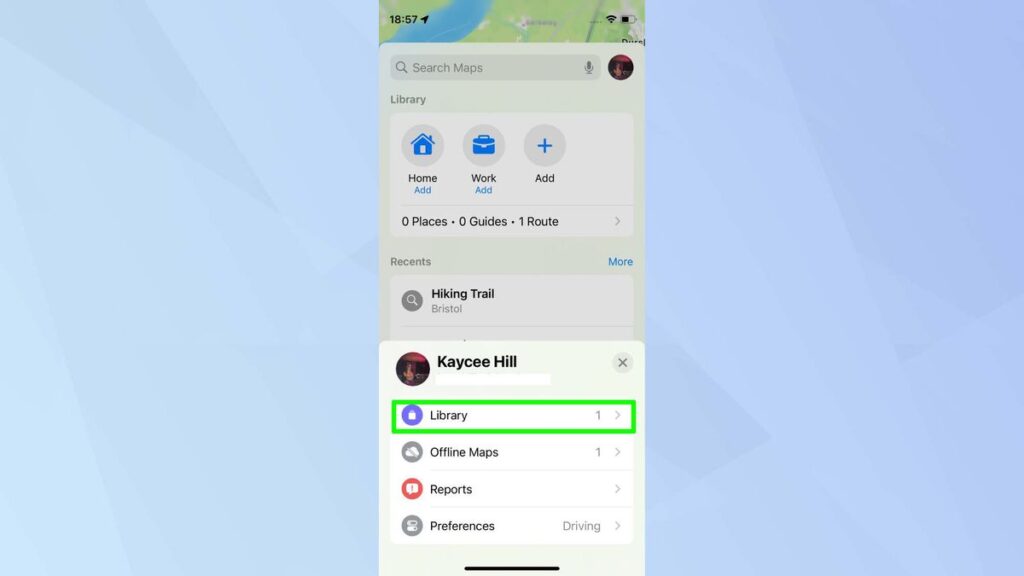
- Using the Library: Tap or click your profile picture (located on the search card for iOS/iPadOS or in the top corner for macOS). From there, select “Library,” then “Routes,” and tap the “+ Create” button to open the route creator.
- Walking Directions: Start by getting directions from one point to another. Below the available routes, tap or click “Create a Custom Route.”
Step 2: Mark Your Points
Once you’ve set your starting point, tap or click along the map to add additional points until you reach your desired endpoint. These points can include roads, paths, businesses, landmarks, or any notable locations. If you need to adjust your route, you can hit the undo button or the path button to view your current route.
Step 3: Choose Routing Options
After mapping out your route, customize it further by selecting routing options:
- Reverse: Tap or click a start or end point on your path, then select “Reverse Route.” This will switch the start and end points and adjust the directional arrows on the path and the elevation chart accordingly.
- Out & Back: If you want to turn your route into a round trip, select a point on the path and tap “Out & Back.” This option will alter the endpoint to become a turnaround, adjusting the distance and time to account for the return trip.
- Close Loop: To create a circular route that returns you to your starting point, choose a start or end point and select “Close Loop.” If you haven’t already created a loop, Maps will suggest the most logical path to connect your starting and ending points.
Step 4: Remove Points
To adjust your route, tap or click on a point along the path and hit “Remove Point” to delete it. Depending on the point’s location, removing it may affect the route length or direction.
Step 5: Save to Your Library
Once your custom hiking or walking route is complete, hit the “Save” button. You can rename the path and add notes. On iPhone or iPad, choose whether to download an offline version with the “Download Route” switch. Tap “Done” to finalize the process.

Step 6: View Your Custom Routes
To find your saved routes, tap or click your profile picture and select “Library.” Then choose “Routes” to access all your custom and predefined routes.
Step 7: Download Custom Routes
If you initially chose not to download an offline version, you can easily do so later. From your routes list, tap the More (•••) button next to your route, then select “Download.” This allows you to save the route for use without an internet connection.
Step 8: Manage Custom Routes
To manage your saved routes, tap or click the More (•••) button next to a route. From here, you can “Edit Name & Note” to change the route’s title or description. If you no longer need a route, you can also choose “Delete Route.” Confirm the deletion by tapping or clicking “Delete.”
Step 9: Get Turn-by-Turn Voice Guidance
If you’ve planned routes that aren’t near your current location, you can only receive directions to those routes. However, once you’re nearby, the blue “Directions” button changes to a green “GO” button. Tap this to initiate turn-by-turn voice guidance, ensuring you stay on track during your hike or walk.
Enhance Your Hiking Experience with iOS 18 Maps
With iOS 18, Apple Maps introduces a wealth of features designed for hikers and outdoor lovers. The app now showcases thousands of detailed trail maps and topographic views in U.S. national parks, making it easier for you to explore diverse landscapes.
Key Features for Outdoor Enthusiasts:
- Detailed Topographical Maps: Access in-depth trail information, including terrain features and elevation changes.
- Real-Time Updates: Stay informed about trail conditions and any closures or hazards along your route.
- Customizable Options: With the ability to label routes and add notes, you can create a personalized hiking experience tailored to your needs.


